Price Qty

MA320U & MA270U 4K Monitors - Show Your Mac Colors ✨

Learn more

MA320U & MA270U 4K Monitors - Show Your Mac Colors ✨

📣『New』RD320U - 4K Monitor for Programming

Learn more

📣『New』RD320U - 4K Monitor for Programming

Process Of Soft Proofing In Lightroom To Print With Great Colors

Glyn Dewis
2018/01/24

Beauty,Portrait Photographer/ UK

Glyn Dewis is a photographer, author and educator currently based just outside of Oxford in the UK.

Soft Proofing in Lightroom

Step 1:

In Lightroom’s Develop Module I have a picture file open that I would like to get printed. So, click on the Soft Proofing option which as you’ll remember is located underneath the picture on the left hand side

There is a picture file open that is going to be printed in Lightroom's Develop Module.

Step 2:

When you click on the Soft Proofing option you’ll likely notice that the area around your picture has become much brighter. This tells us we are now in Soft Proofing Mode and is used to simulate the paper that the picture is being printed on; we’ll cover this in a little while. For now though, once you’ve done this the next thing to do is click on the Y|Y icon to go into a Before / After view.

Step 3:

Go to the right hand side of the Develop Module and click where you see Create Proof Copy

Notice now that the left hand image (Before) is labelled as Copy and the right hand image (After) is labelled Proof Preview (figure 4)

It shows the difference between copy and proof review.

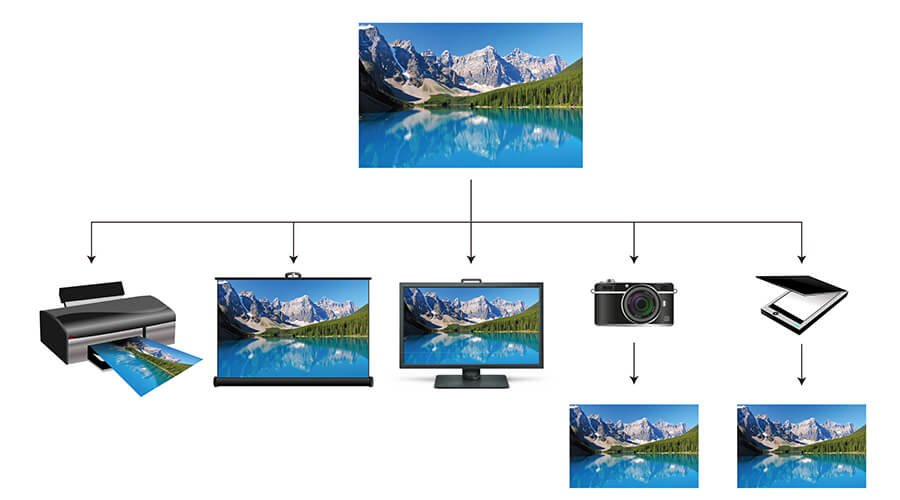
The idea now behind Soft Proofing is that when we choose an ICC Profile, the Copy (original Before version) remains the same and the Proof Preview (After) takes on the look of what the file will look like when printed. All we need to do is to make some suitable adjustments to make the Proof Preview (After) look like the Copy (original Before version) so that when it goes through the printing process the adjustments we make merely over compensate and it comes back printed and looking pretty much identical. Note: The Proof Preview is the file that is sent for printing

Step 4:

In the Develop Module click to the right hand side of where it says Profile and the name of a profile...if displayed. This opens a menu showing all the available ICC Profiles for all the different paper types / mediums that you have installed. If you don’t see the ICC Profile you are looking for even after having downloaded and installed it, simply click on Other and in the pop up dialog that appears, tick the relevant checkbox and click OK

When we now choose an ICC Profile from the menu which relates to the paper / medium we want to get the file printed onto you may or may not notice much of a difference between the image on the left (before) and image on the right (after) i.e the Proof Preview. If this is the case then great...you’re good to go and have nothing to worry about. If however you do notice a difference, now is the time to start making some adjustments using the sliders and if need be Adjustment Brush that you’re familiar with in Lightroom.

Sometimes you might just notice that the blacks have flattened out a little; in which case try giving the Blacks slider a boost and so on. Make sense?

A great way to see if there’s any difference between the two images is by looking at the Histogram in the top right of the screen. In this example, the histogram on the left shows Adobe RGB as the profile but the histogram on the right is when I chose one of Loxley Colours Metallic Print ICC Profiles. You can see that it’s much more bunched up on the left (the blacks) so in this example I might want to reduce the Blacks slider a little.

Relative or Perceptual?

You’ve probably noticed that there’s two other options available to us when Soft Proofing where we see the words Intent underneath the ICC Profile name / menu

RELATIVE: Unprintable Colours are Replaced

In this case you would be saying to the printing process…”If there are any colours in my picture that are too saturated for you to print accurately , what I want you to do is find the nearest possible colour to it that is saturated and that you can print and use that instead”

The great thing about RELATIVE is that it will only replace the colours that it i.e. the Lab or Printer can’t physically print. All others are left alone.

PERCEPTUAL: Unprintable Colours are Desaturated (plus some others colours too)

In this case you would be saying to the printing process…”If there are colours in my picture that are too saturated for you to print accurately then desaturate them to the point that you can print them”

Now this will obviously have an impact on how your picture looks if you are desaturating certain colours but in addition,PERCEPTUAL will also reduce saturation in some other colours across your picture as well; even those that the Lab / Printer was perfectly capable of printing.

To show you, Lightroom will put an overlay across the saturated colours in your picture that the Lab / Printer can’t print accurately (figure 9). When you see this overlay you could of course move some sliders in Lightroom to try to bring the colour back into Gamut (the amount of colour that the Lab / Printer can reproduce) but I tend to find choosing Relative or Perceptual gives the best results.

Now you might be thinking after reading this that RELATIVE is definitely the best choice, but I really do wish it was that simple. You’ll find that it’s very much a case by case basis; on some pictures RELATIVE will produce the best results and in others it will be PERCEPTUAL. Thankfully though because of Soft Proofing you’ll see it on the screen rather than wasting money on prints to find out which one works best for a particular file. Just so that you know though, the default setting in Lightroom and in Photoshop is RELATIVE.

What about the ‘Simulate Paper and Ink’ option?

You’ll find the checkbox to activate this in the Soft Proofing tab but I’ll be perfectly honest with you when I say that I never use this. I did experiment with it quite a bit when I first started soft proofing but I’ve not found that it makes any worthwhile difference to the final print.

And here’s the process of soft proofing in Lighroom. In the next part, I will be showing you how to sift proofing in Photoshop.

Was this article helpful?

Yes No

Subscribe to Our Newsletter

Stay tuned for our product launches, upcoming news and exclusive benefits.

Subscribe
TOP