Projector
Monitor
Lighting
Digital Display
Job References
This site uses cookies. By continuing to browse the site you are agreeing to our use of cookies, you can also manage preferences.
This site uses cookies. By continuing to browse the site you are agreeing to our use of cookies, you can also manage preferences.
Projector
Monitor
Lighting
Digital Display
Job References
Projector
Monitor
Lighting
Digital Display
Job References
Knowledge Center SupportIn the last article “Color management is the key to reproduce consistent colors", we briefly introduced the concept of color management: the model of maintaining consistent color appearance across different devices. But how do we actually incorporate the concept into real-world workflow?
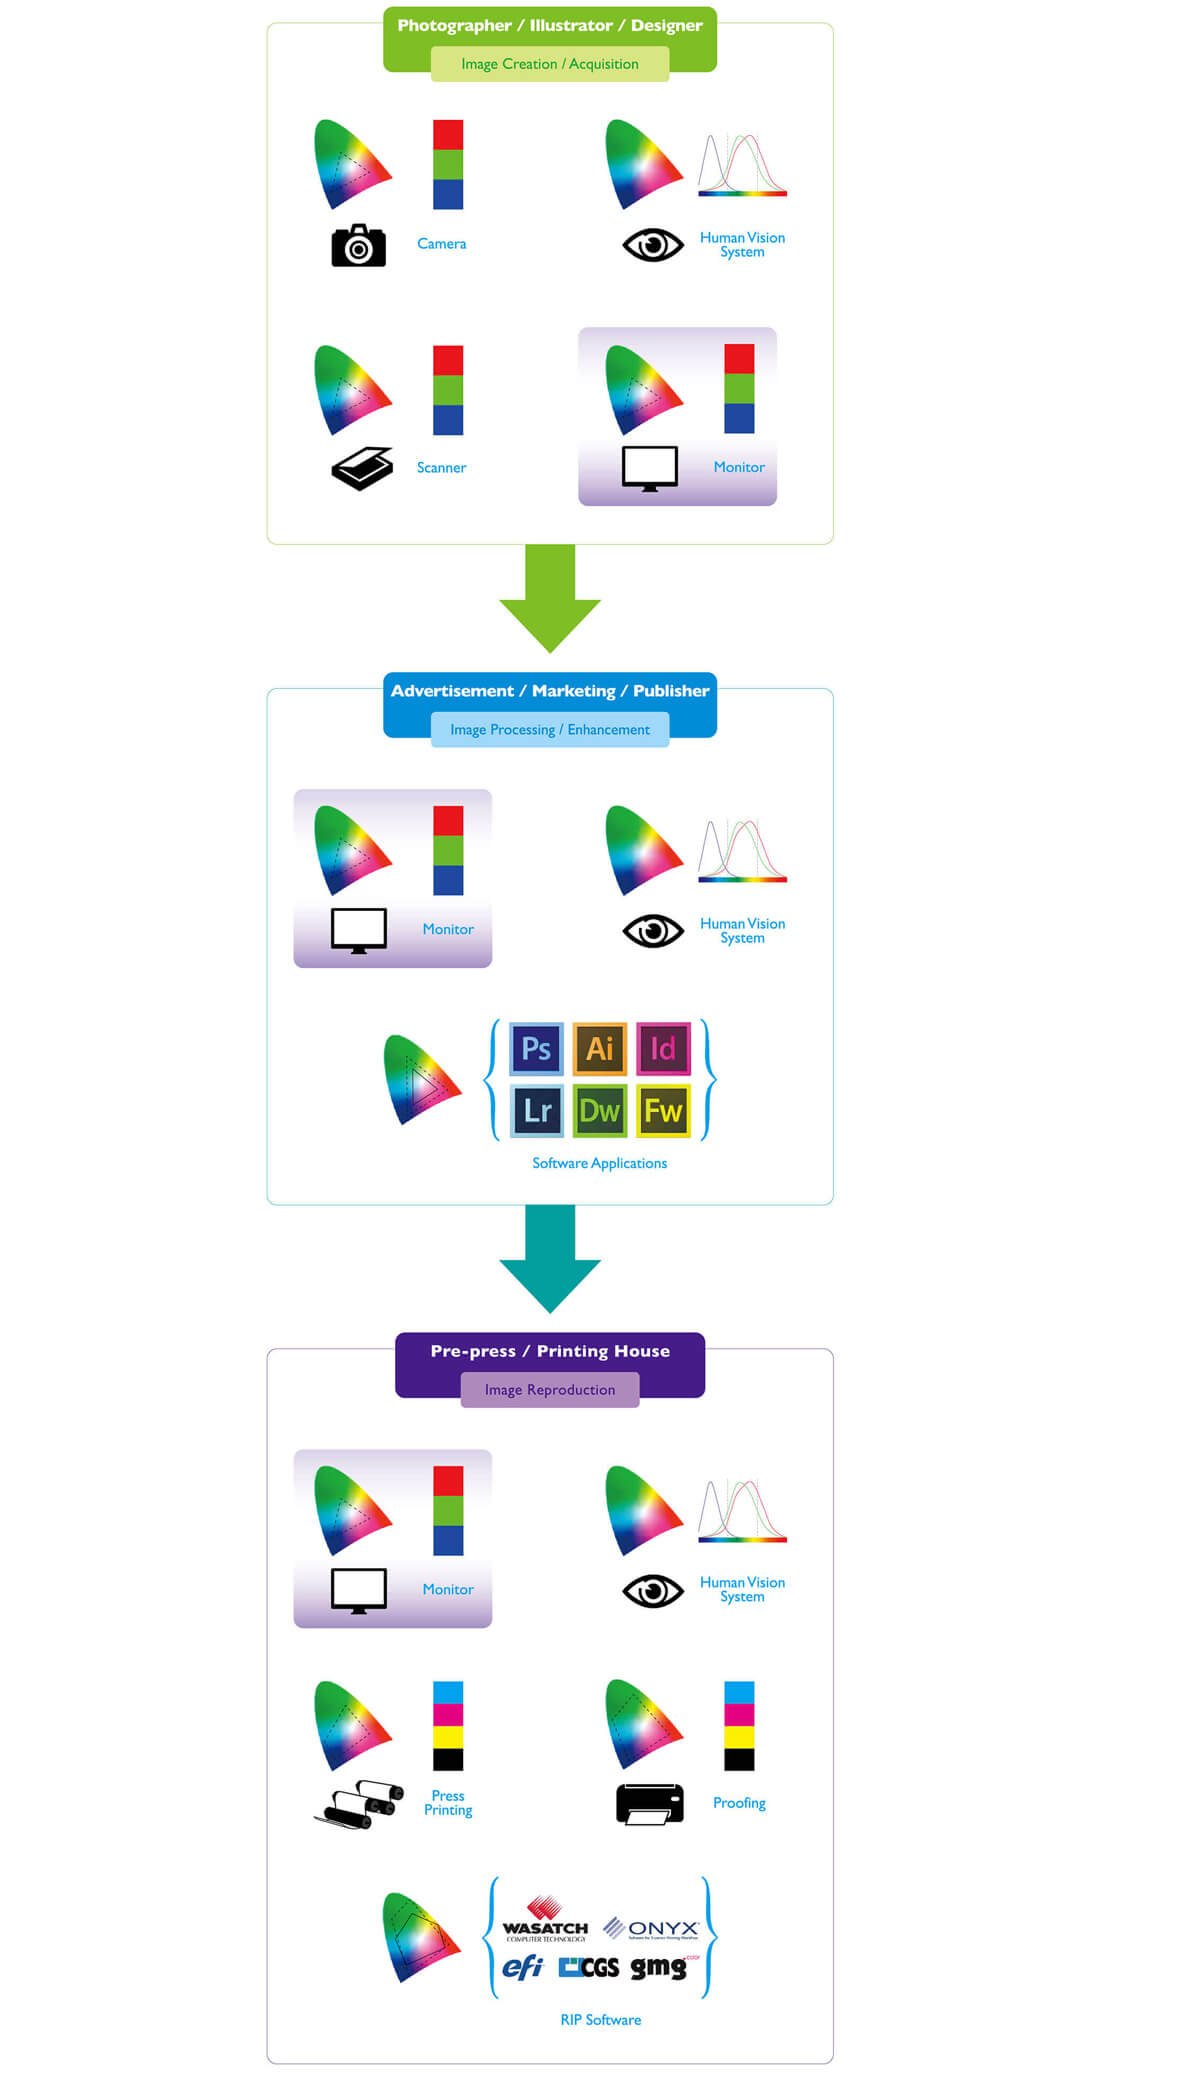
Let’s start by looking at what is the workflow for producing colors or images. Figure 1 illustrates a typical workflow for producing colors or images. There are three stages involved, namely image creation/acquisition, image processing/enhancement, and image reproduction. In order for color management to work, it will need to be integrated into the same workflow.

Figure 1: Typical color management workflow.
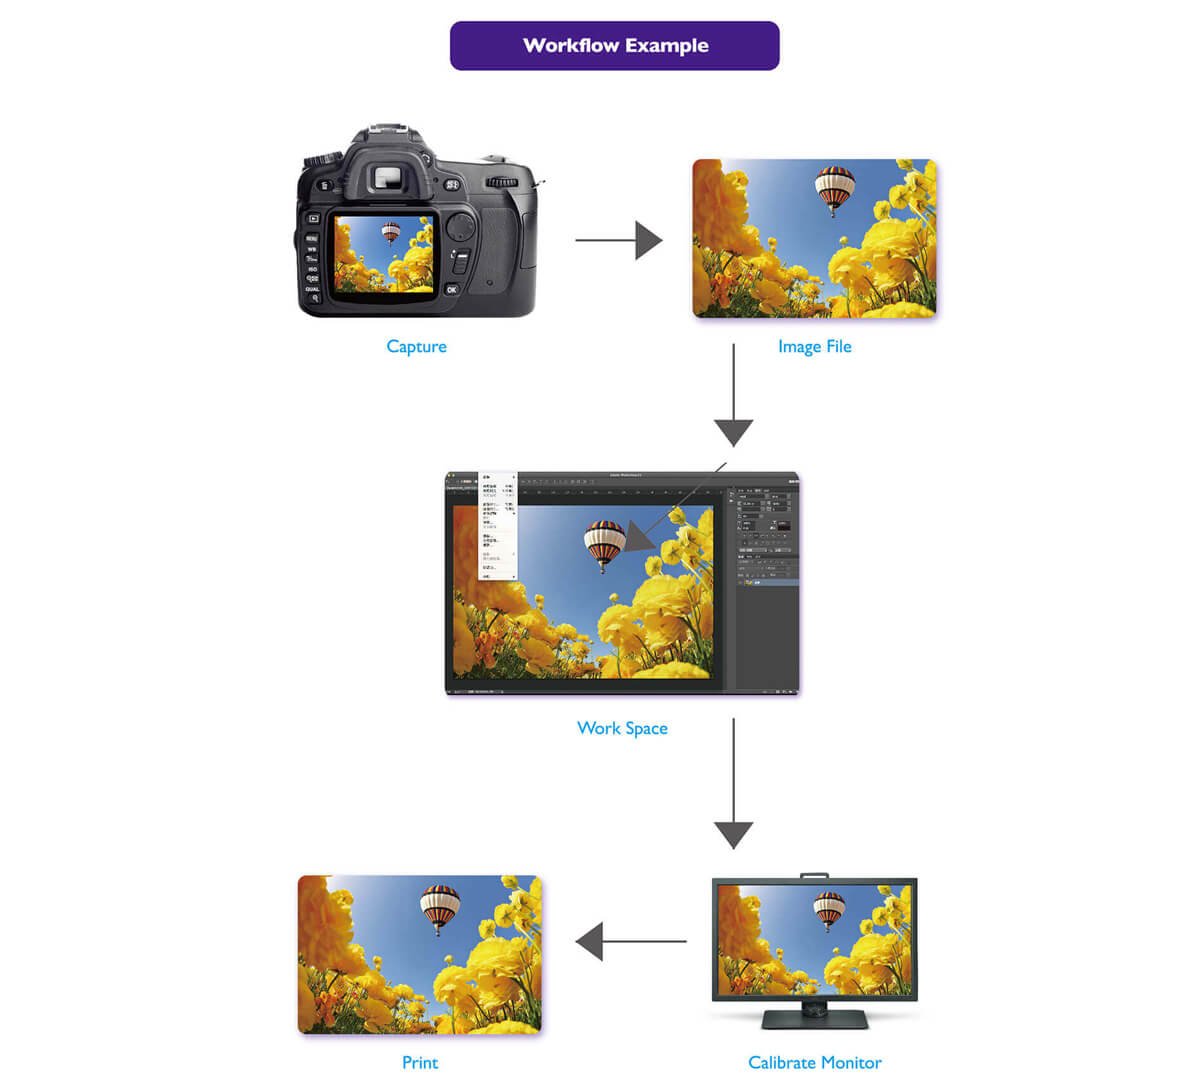
Let’s take a look at each stage more closely. In order to reproduce an image, we must have an image to begin with. Therefore, the first stage is to produce the image in electronic form. There are two ways to accomplish this, one is to draw the image or illustration using a computer, and the second way is to capture a scene using a digital camera. Once we have an image, we would definitely like to make the image more attractive or alter it to our liking. This is the enhancement stage. After the image is enhanced, the final stage is reproduction. Reproduction is not only limited to hardcopy printing, but also involves sending images electronically, such as passing images by flash drive, sending images via e-mail, and posting images online, for example sharing them on Instagram or Facebook. Figure 2 gives an example of color management workflow in practice.

Figure 2: Example of a real-world color management workflow.
The devices listed under each stage represent the devices that could be utilized in that stage. For example, we need a camera to capture the scene, we use a scanner to digitize a hardcopy image, or we draw an illustration on a computer. There are different devices associated with each stage, but there is one device that is in common for all three stages. And I believe you already know which device we’re talking about. Yes, it is the monitor. Why is this the only device that occurs in all three stages? Because nowadays almost 99.5% of the artwork or images are in digital form, and unfortunately, we still don’t have the technology to allow humans to view digital content directly, such as by plugging an SD card into our brain. We still need a display device to enjoy digital content, and the most often used device is by far the monitor. Of course, one could argue that a projector could also be used, but we don’t have the luxury to have a large, undecorated wall and dark surroundings with us at all times. Hence, one could consider the monitor as the most important tool used in the color management workflow.
The reason why the monitor is the most important tool in color management workflow is because humans rely on seeing the colors displayed on it to judge whether they like it or not. Figure 3 illustrates this idea. If the monitor displays a greenish skin tone image, then we would adjust the image by decreasing green to make the skin tone more natural. However, we could not determine if the greenish cast is from the file, or if it is from the monitor itself. If it is from the file, then decreasing green tone will result in a good natural looking skin tone image on other monitors. But if the greenish cast is from the monitor, then decreasing green tone will result in an image with very little green tone, which will not look pleasant nor natural on other monitors. Hence, having the monitor calibrated regularly can reduce the risk of having overly or wrongly adjusted images.
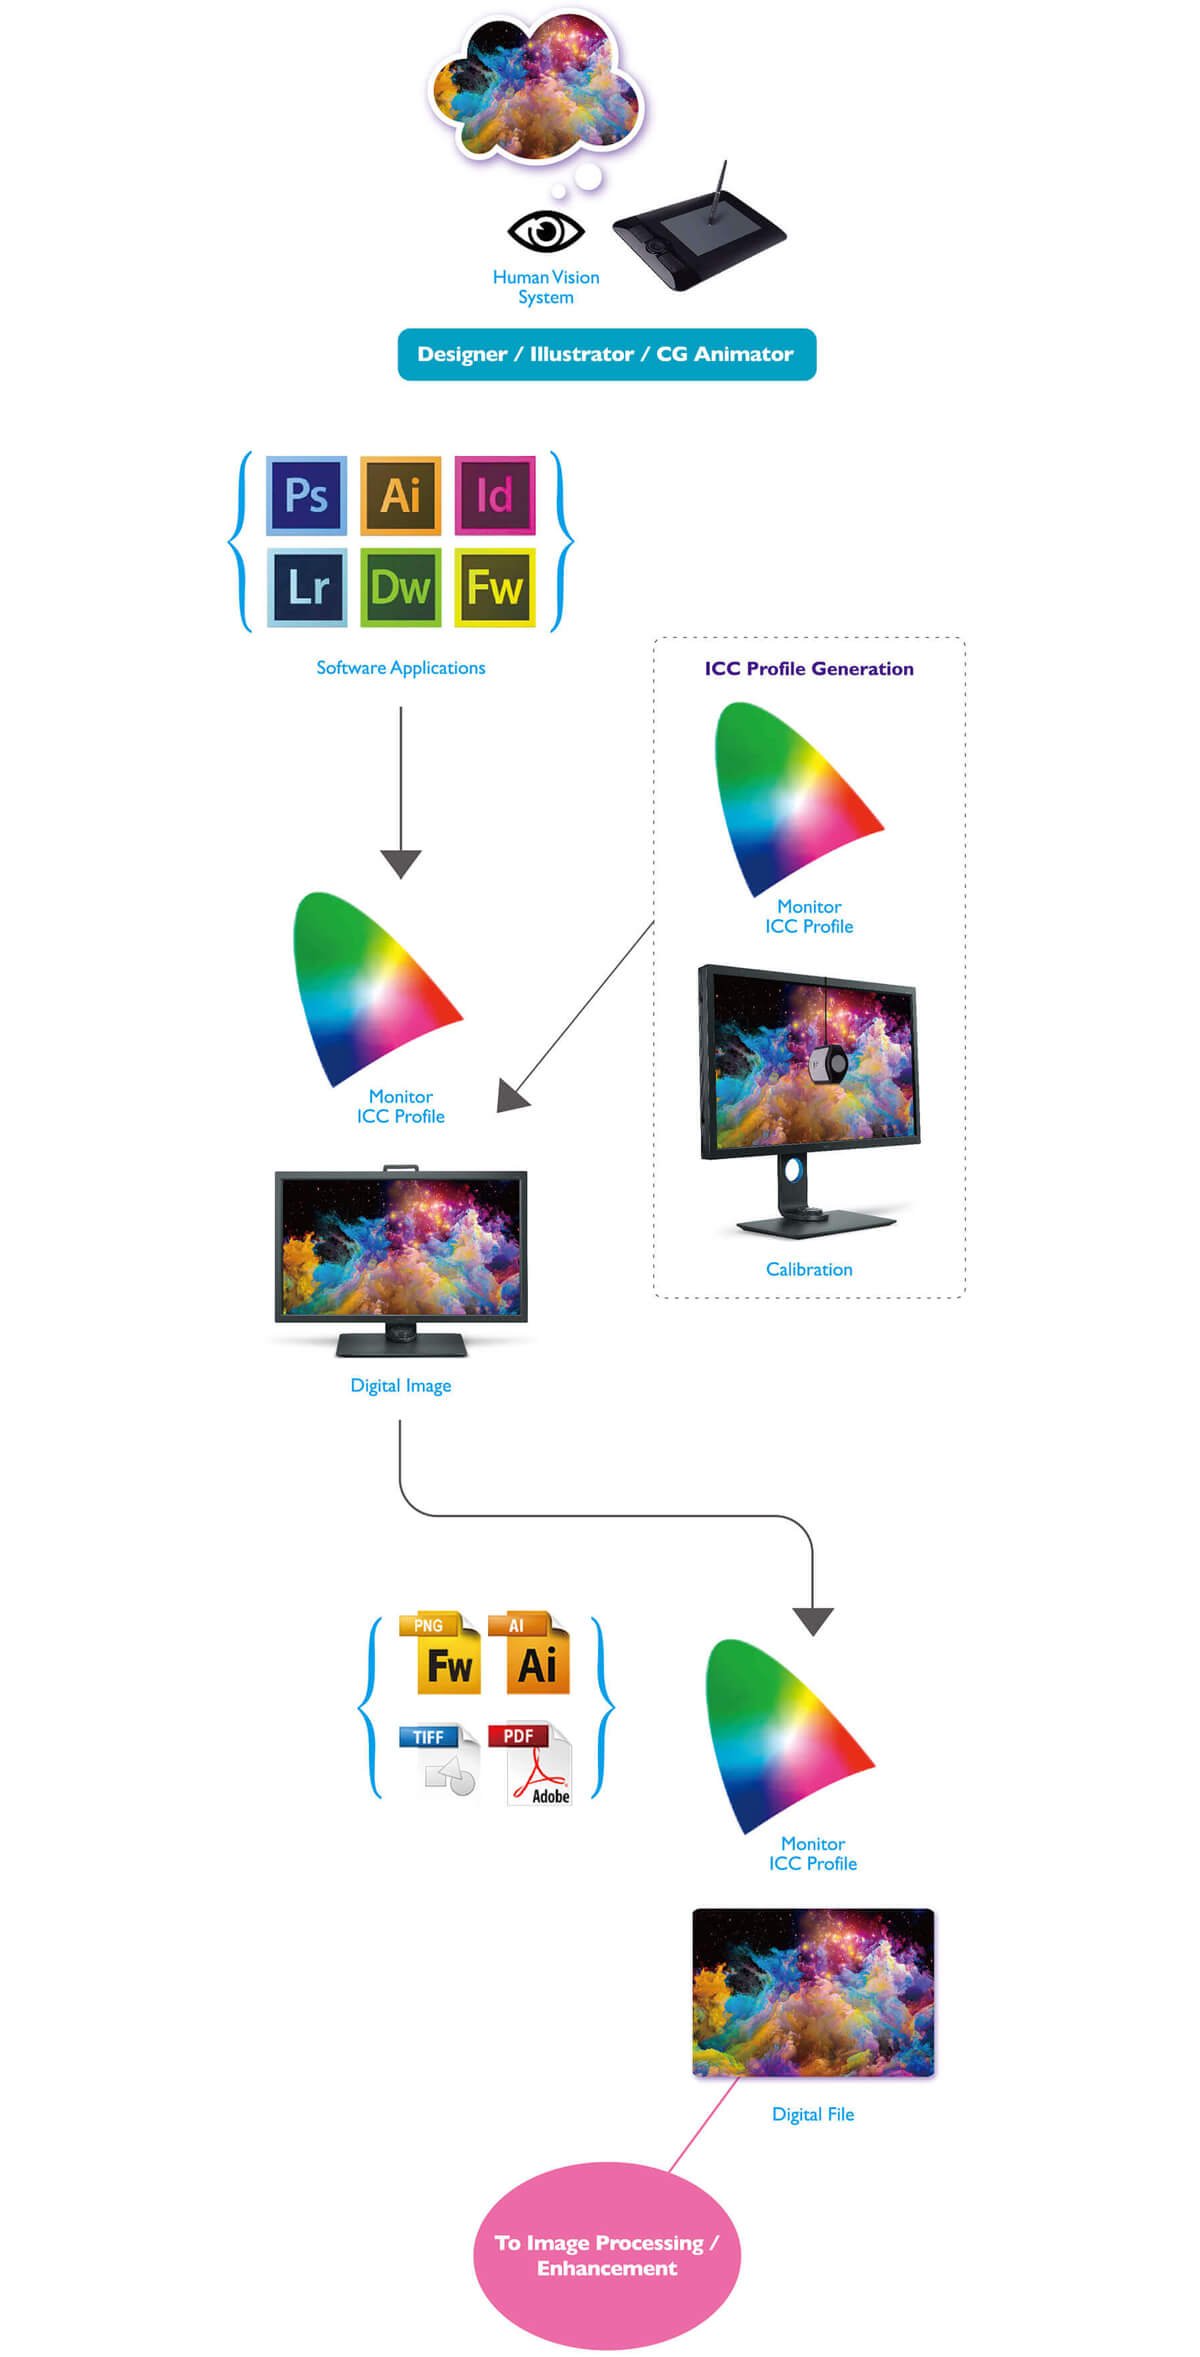
How should image creators incorporate color management in their workflow? First of all, let us define the image creator. Anyone who “creates” the image falls into this category, for example, photographers, illustrators and designers. Figure 4 illustrates the typical workflow for designers. The designers usually have an idea or “image” in their mind, and they use a computer with drawing tablet to “draw” the work in software applications. The monitor provides a “feedback” of the drawings, so the designers know what the image looks like, and if it has the right artistic intent. So there is no doubt that seeing the right colors is crucial for designers to judge if the work reflects what they have in mind. Therefore, the monitor they use must be calibrated to a unified set of parameters to ensure all the work is created and viewed under the same conditions, and to prevent the greenish skin tone example mentioned earlier.

Figure 3: Humans rely on seeing colors to judge whether they like it or not.

Figure 4: Typical designer’s color management workflow.
Once the monitor is calibrated, an ICC profile for that particular monitor will be generated. This ICC profile should be sent along with the image so that others in the color management workflow can replicate the environment where the original image was created. In other words, others can view the same colors as the original designer did, and make sure the original artistic intent can be preserved. The details about how using ICC profile can achieve this will be explained in detail in subsequent articles.
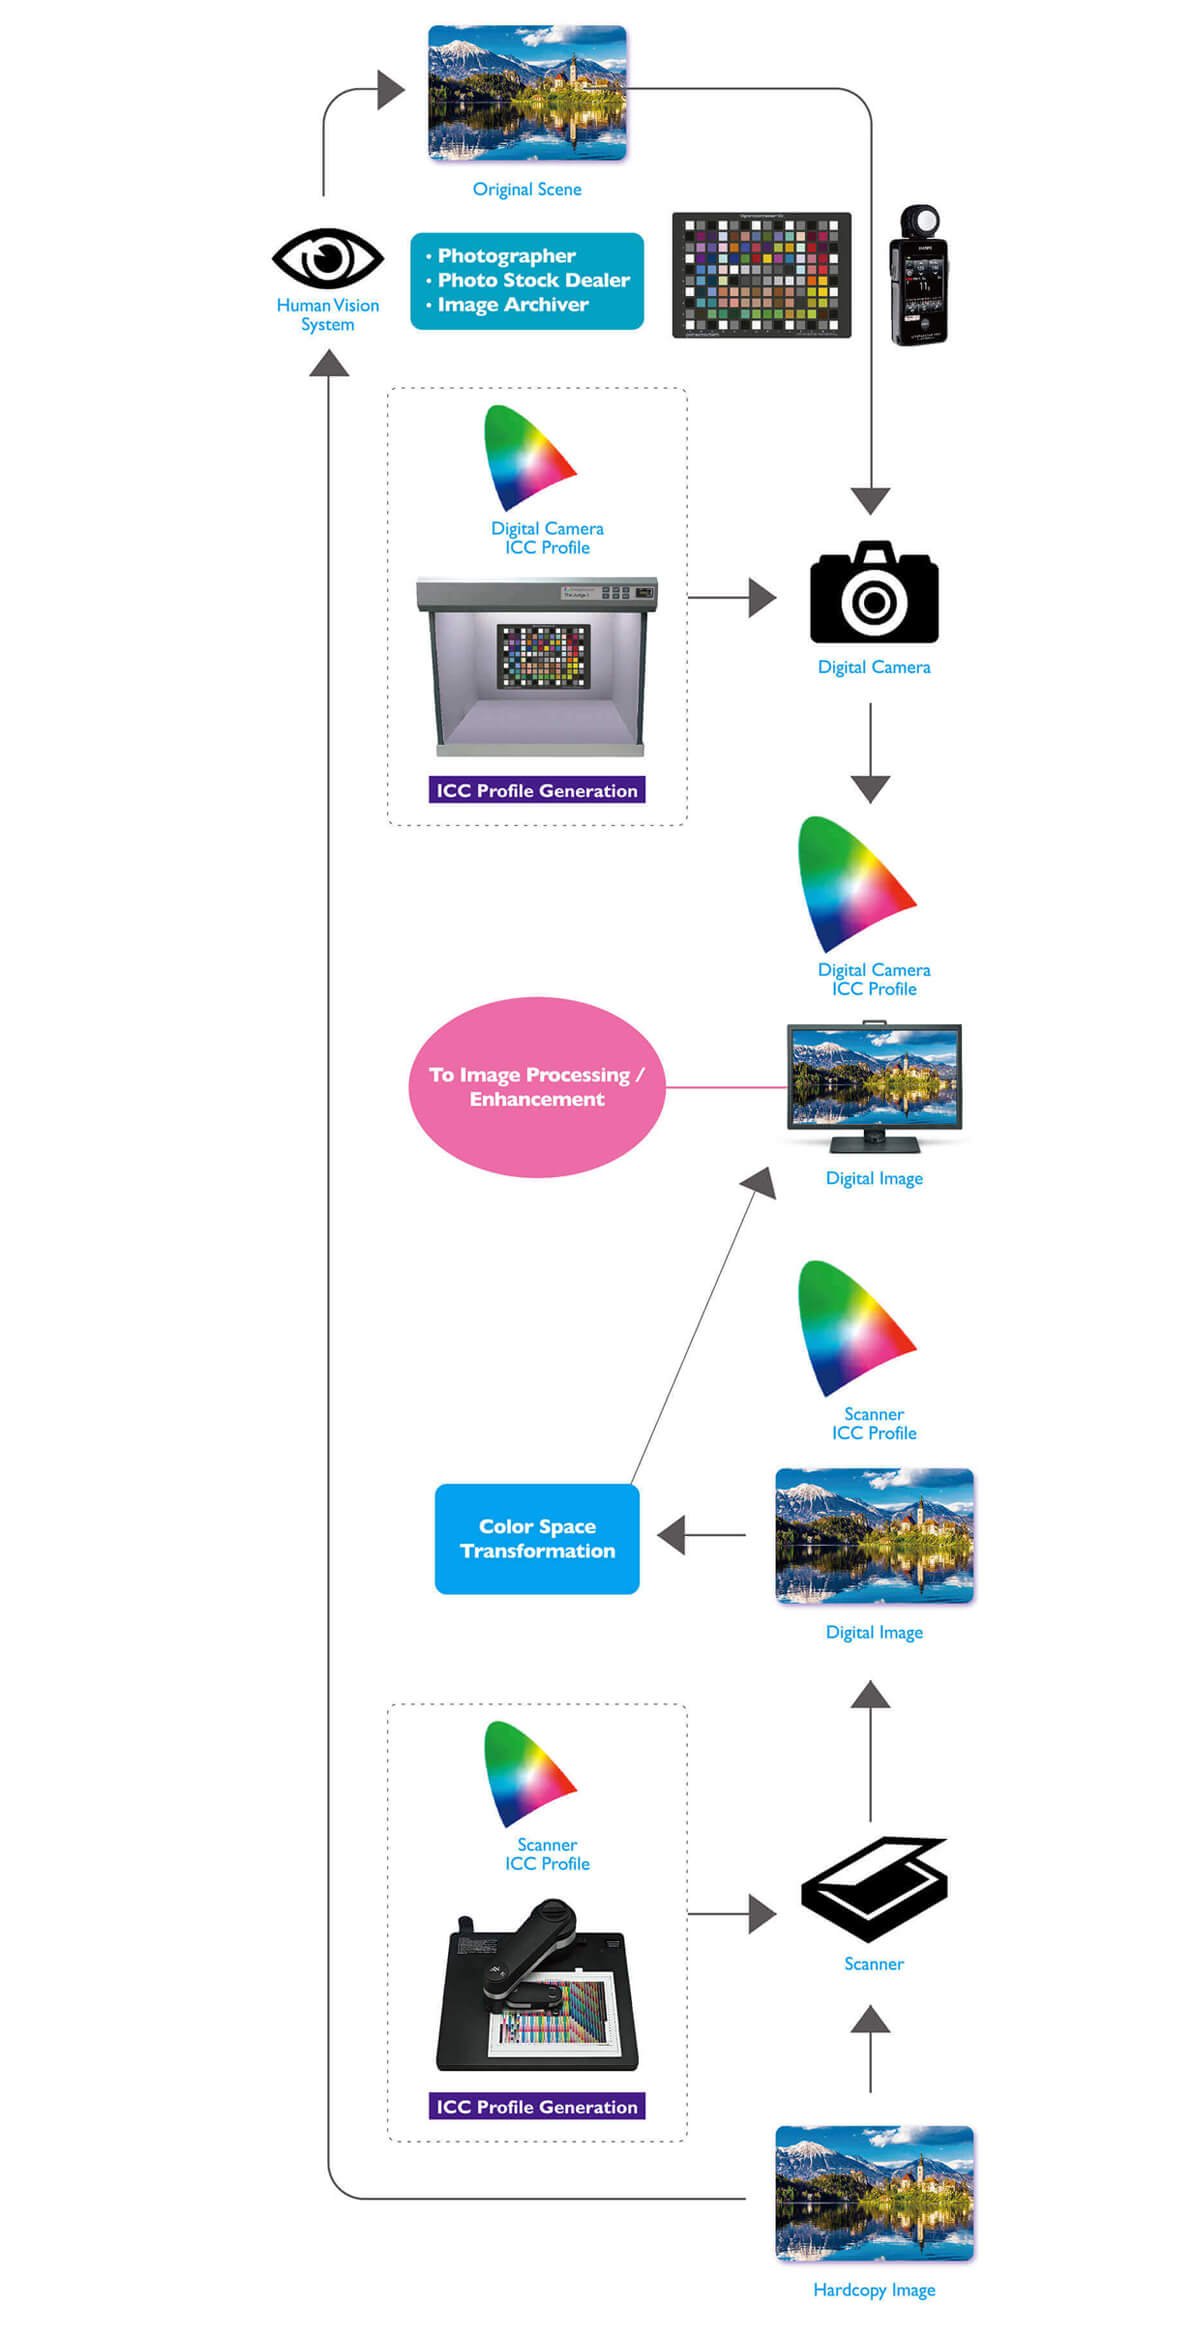
As for the photographers, the workflow is a bit more complicated, as you can see in Figure 5. When a photographer wants to “preserve” the appearance of the real scene, the photographer needs to place a color checker in the scene, and use an exposure meter to determine the right aperture and shutter speed. Not surprisingly, there is an ICC profile associated with the particular camera he or she uses, and the ICC profile should also be preserved along the workflow. The ICC profile can be either downloaded from manufacture’s website, or it can be created using a color checker and a viewing booth.

Figure 5: Typical photographer’s color management workflow.
If a scanner is used to digitize a hardcopy image, all you need is a good scanner with its ICC profile ready. The same as the digital camera, the ICC profile for the scanner can be downloaded from manufacture’s website, or it can be created using a color checker with a spectrophotometer. A spectrophotometer is a device that measures the colors on the substrate spectrally and gives accurate measurement. Both of these methods require a color transformation to the monitors if someone would like to see the correct images. The color transformation is done either inside the software application or the operating system. Nonetheless, the monitor should definitely be calibrated to allow the user to perceive the right color.
We have learned what is the typical workflow for color management, and its three main stages. We have also looked into how to incorporate color management into designers’ and photographers’ workflow. Coming up in the next article, we will be discussing more details about color management workflow for enhancing the images and reproducing the images.
Thanks for your feedback!