2024/05/20
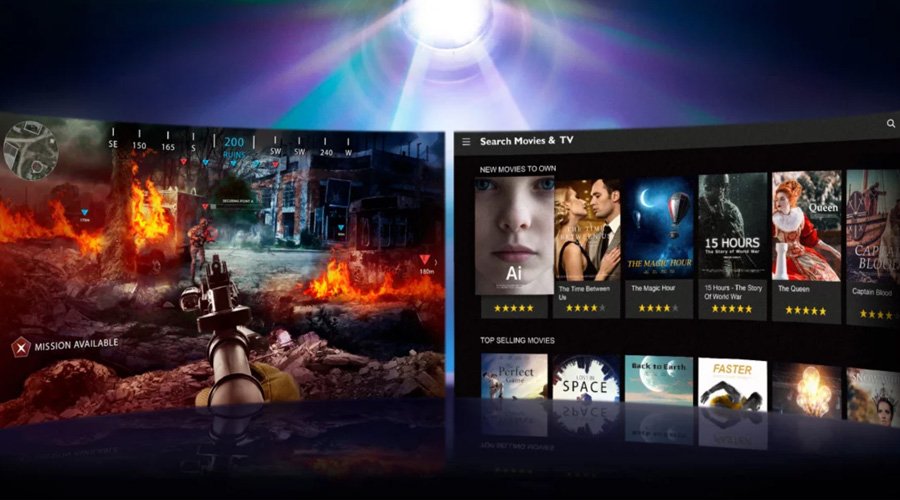
Are you tired of the TV screen taking up space in your living room? It's time to elevate your entertainment experience and embrace the wonders of a projector as a TV. In this comprehensive guide, we will walk you through the simple steps to unleash the full potential of your projector and transform any wall into a mesmerizing cinematic screen.
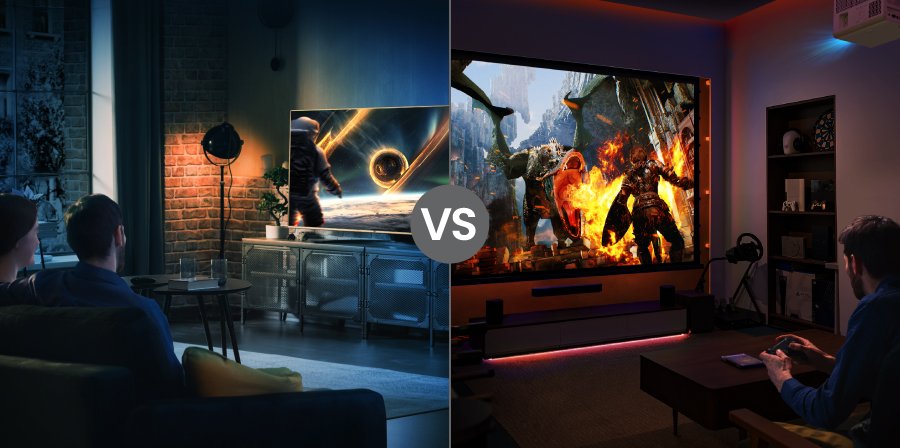
Using a projector as a TV offers a range of benefits that go beyond a traditional television set. Imagine immersing yourself in captivating visuals that sprawl across an entire wall, bringing your favorite movies, shows, and games to life like never before. Experience breathtaking colors, vivid details, and an unparalleled level of immersion, creating a true cinema-like ambiance within the comfort of your own home.
With a projector, you can indulge in a larger-than-life display, making every movie night, sports event, or gaming session a truly unforgettable experience. Say goodbye to conventional TVs and join us on this journey to unlock the ultimate cinematic experience with your very own projector.
A TV tuner is an essential component for using a projector as a TV because it allows you to receive and display broadcast signals on the projector. Whether you want to watch your favorite TV shows, sports events, or news, a TV tuner is necessary to access these channels.
To use your projector as a TV, you'll need to connect a cable or satellite box. The cable box receives the TV signal from your cable or satellite provider and converts it into a format that can be displayed on the projector. By connecting the cable box to the projector, you'll be able to watch your favorite TV channels just like you would on a regular TV.
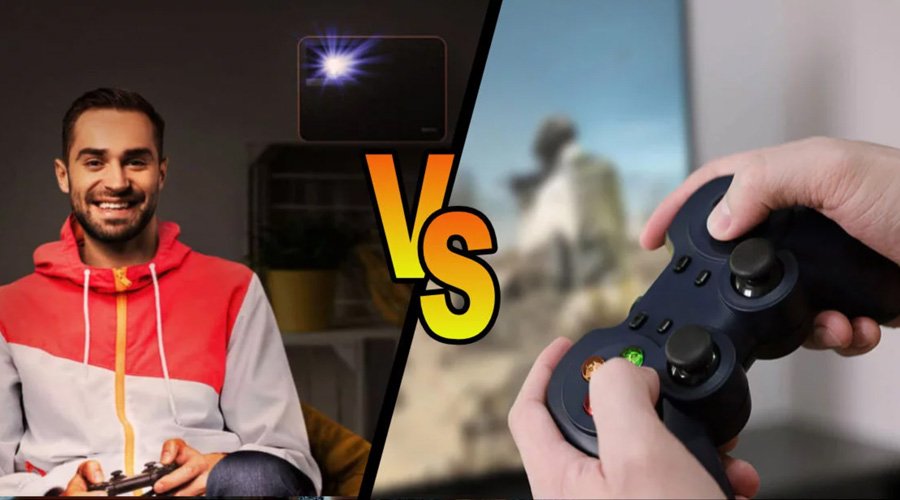
If you're a gaming enthusiast, you can connect gaming consoles to your projector and enjoy games on a larger screen. Whether you have an Xbox, PlayStation, or Nintendo console, connecting it to the projector will enhance your gaming experience by providing a larger and more immersive display.
If you enjoy watching movies, connecting a DVD or Blu-ray player to your projector will allow you to enjoy your favorite films on a big screen. The projector will display the movie with enhanced visuals, making it feel like you're at a theater. Simply connect the DVD or Blu-ray player to the projector and start watching your favorite movies in a whole new way.
Setting up a projector to use it as a TV involves several key steps. In this section, we will guide you through the process of mounting the projector, connecting power cables, and adjusting display settings for the best viewing experience.
Mounting the projector securely is crucial to ensure stable and optimal viewing. Follow these step-by-step instructions:
Adjusting the display settings is necessary to optimize the visual quality of the projected image. Follow these instructions:
Read More: How to Mount a Projector to a Ceiling?
HDMI (High-Definition Multimedia Interface) is a popular and versatile connectivity option for using a projector as a TV. It allows you to transmit high-quality audio and video signals from your TV to the projector. HDMI connections are widely supported by most modern projectors and TVs, making them a convenient choice for connectivity.
VGA (Video Graphics Array) is an older type of connection that is still commonly found in projectors. It allows you to transmit analog video signals from your TV to the projector. While not as advanced as HDMI, VGA connections can still deliver decent video quality for your projector setup.
Component video and audio connections are another option for connecting your TV to a projector. These connections use separate cables for transmitting video and audio signals, resulting in better quality compared to VGA. However, not all projectors and TVs support component video and audio connections, so it's important to check compatibility before using this option.
When selecting the connectivity option for your projector, it's crucial to consider the compatibility between your TV and projector. Check the available ports on both devices and ensure they support the same type of connection. Additionally, consider the quality of audio and video you want to achieve, as different connectivity options may vary in their capabilities.
Once you have set up your projector and connected it to your TV, it is important to adjust the display settings for the best viewing experience. Here are some key adjustments you can make:
To adjust the resolution on your projector, go to the settings menu. Look for the display or picture settings and select the resolution option. Choose the highest resolution available for the best picture quality. Keep in mind that the resolution may be limited by the inputs of your video sources, so check the capabilities of your devices.
Aspect ratio refers to the proportional relationship between the width and height of the image. Most projectors offer various aspect ratio options, such as 16:9 for widescreen content or 4:3 for standard content. Adjust the aspect ratio according to the source material you are watching to avoid image stretching or cropping.
To calibrate the colors on your projector, access the color settings in the menu. Look for options like color temperature or color balance. Use the built-in test patterns or calibration discs to help you make adjustments. Aim for accurate color reproduction by adjusting the contrast, brightness, hue, and saturation settings.
Keystone correction is useful for correcting image distortion caused by the projector being placed at an angle or not aligned properly with the screen. Most projectors offer automatic keystone correction, but if not, you can use the manual keystone adjustment controls. Make sure the projected image is rectangular and not skewed.
Achieving a sharp focus is crucial for a clear and detailed image. Most projectors have a focus ring or button that allows you to adjust the focus manually. Use test patterns or text to help you achieve the sharpest focus possible. Keep in mind that the projector's distance to the screen can affect the focus, so make necessary adjustments.
When using a projector as a TV, getting the audio setup right is essential for an immersive viewing experience. Here are some options to consider:
To enhance your gaming experience, consider connecting external audio devices like soundbars or speakers to your projector. Check if your projector has an audio output port, and if so, connect it to the input port of your sound device. Adjust the projector's audio settings to route sound through the connected device, and test the audio by playing a video. With this setup, you can enjoy immersive sound while gaming without compromising on simplicity.
For a hassle-free audio solution, utilize your projector's built-in speakers, which offer adequate sound quality for most viewing needs. First, check your projector's connectivity options. If it has built-in speakers, simply connect the necessary audio cables to the appropriate ports. Then, adjust the volume settings on your projector and any external devices as needed. This straightforward setup ensures you can enjoy your content without the complexity of additional audio equipment.
For seamless audio-video synchronization, follow these simple steps. First, verify if your projector offers audio delay settings, which is crucial for aligning sound with video playback. Next, navigate to the projector's menu to access these settings. Then, fine-tune the delay until both audio and video are perfectly synchronized, ensuring an immersive viewing experience without any discrepancies.
Choose a Gaming Projector that Fits Your Gaming Room
One of the key benefits of using a projector as a TV is the ability to connect multiple video sources. Whether you want to watch a movie on Blu-ray, play your favorite video game, or stream content from your laptop, a projector offers the flexibility to switch between these different sources with ease.
Harness the power of HDMI inputs for seamless device integration with your projector. HDMI connections offer unparalleled convenience, supporting various video sources like gaming consoles, DVD players, laptops, and streaming devices. To effortlessly switch between connected devices, follow these straightforward steps: First, access the "Input" or "Source" option using either the remote control or the projector's menu buttons. Next, select the HDMI input corresponding to your desired device. With a simple selection, your projector seamlessly displays content from the chosen device, ensuring a hassle-free viewing experience.
First, inspect your HDMI cables to ensure they're snugly connected; loose or damaged cables can lead to signal loss or diminished image quality. Next, try rebooting your devices as software glitches can occasionally cause disruptions. Verify device compatibility by ensuring that your video sources match the projector's resolution and refresh rate requirements. Lastly, keep your projector and video sources up to date by checking for firmware or driver updates, which can enhance compatibility and performance.
To access the projector's menu and adjust its various settings, you have two options: using the remote control or the on-screen controls.
If you have a remote control, look for the menu button and press it to bring up the menu on the projector screen. You can then navigate through the different options using the arrow keys and select the desired settings.
If your projector doesn't come with a remote control or if you prefer using the on-screen controls, look for the menu button on the projector itself. Pressing the menu button will display the menu options on the projection screen. Use the navigation buttons on the projector or built-in touch controls, if available, to navigate through the menu and make adjustments.
Controlling the volume on your projector is crucial for a great viewing experience. Depending on your projector model, you can adjust the volume using the remote control or the on-screen controls.
If you have a remote control, it typically comes with volume buttons. Simply use the volume up and down buttons to increase or decrease the volume as desired.
For projectors without a remote control, locate the volume adjustment buttons on the projector itself. These buttons are usually labeled, making it easy to identify. Press the volume up or down button until you reach your preferred audio level.
Switching between different input sources on your projector allows you to connect various devices and enjoy different content. The method to change input sources may vary depending on your projector model.
If you're using a remote control, look for an input/source button and press it. This should display a list of available input sources on your projector screen. Use the arrow keys on the remote control to navigate through the options and select the desired input source.
In case your projector does not come with a remote control, you can usually change input sources by navigating through the projector's menu. Go to the settings option, look for input settings, and choose the input source you wish to use.
Aside from the main menu options, projectors often provide additional settings and features that you can explore to enhance your viewing experience. These settings can include image settings, color adjustments, keystone correction, and more.
To access these settings, use the same method mentioned above for navigating the projector's menu. Look for the specific settings you're interested in and make any adjustments accordingly to suit your preferences and optimize the projector's performance.
When using a projector as a TV, selecting the right projection screen is crucial for achieving optimal image quality. Here are some factors to consider when choosing a projection screen:
Once you have chosen the right projection screen, follow these steps to set it up in your desired viewing environment:
Creating a good viewing environment is crucial to ensure the best possible experience when using a projector as a TV. By controlling ambient light and ensuring optimal screen distance, you can enhance the picture quality and overall enjoyment of your favorite movies and shows. Here are some tips to help you optimize the viewing experience:
By following these tips, you can create an immersive and comfortable viewing experience when using a projector as a TV. Experiment with different settings and adjustments to find the perfect configuration for your space.
Using a projector instead of a traditional TV can completely transform your home entertainment setup.
Get ready to immerse yourself in larger-than-life visuals, create your own home movie and gaming experience, and rediscover the magic of entertainment in a whole new way. With the tips and techniques you've learned here, you'll be able to make the most out of your projector setup and enjoy countless hours of entertainment with family and friends.
Choose a Gaming Projector that Fits Your Gaming Room
{{title}}
We will notify you when the product becomes available.
{{notifyMeNote}}
We will send you an email once the product becomes available.
Sorry, our store is currently down for maintenance.We should be back shortly. Thank you for your patience!
The requested qty is not available
The requested qty exceeds the maximum qty allowed in shopping cart
Product that you are trying to add is not available.
Get All the Knowledge About Gaming Projector