Build a Home Golf Simulator with the Perfect Projector
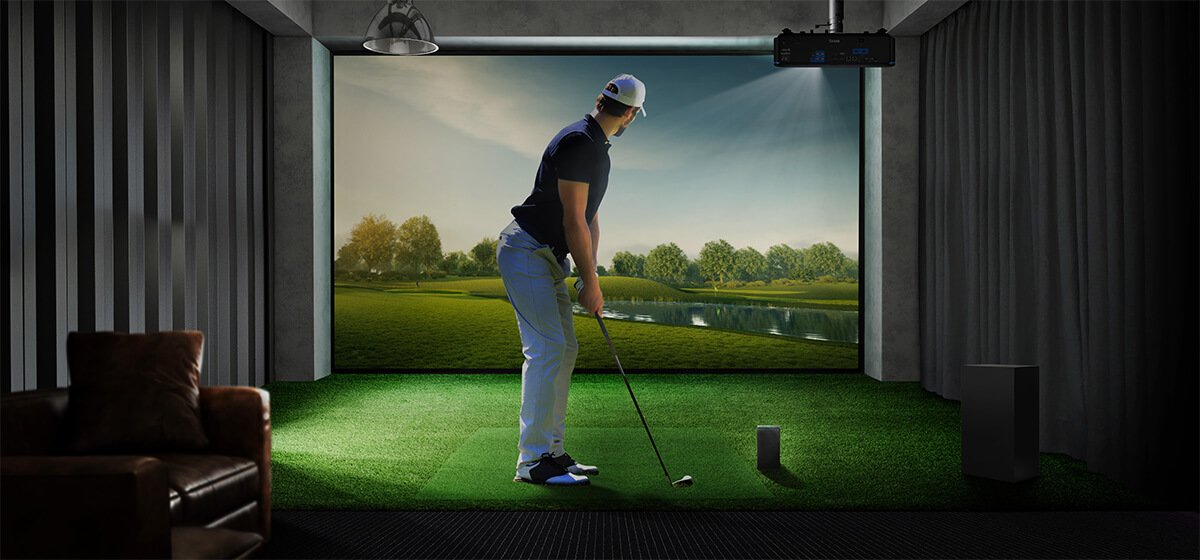
In recent years, the technology behind golf simulators has evolved to a point where many individuals have started to build their own DIY simulators, giving those who might not have otherwise had a chance to frequent golf ranges a chance to focus on their golf skills in the comfort of their own homes and at the time of their choosing. But what does it take to build your own golf simulator and what are some of the things you need to know before you start on such an endeavor?
What Main Items Will I Need to Create a Home Golf Simulator?
- Launch monitor : This key piece of hardware is a sensor used to measure the club head speed, launch angle, carry distance, and all other data related to your golf swing. Launch monitors are usually classified based on the type of technology they use: infrared sensors, laser sensors, high-speed photography, or high-speed 3D imagery.
- Impact screen : An impact screen, as its name implies, is a screen used to display the visuals for the simulator. Beyond that, it also features noise-cancelling and shock-absorbing capabilities that allow it to deal with the impact from a golf ball.
- Computer with golf simulation software : A computer is needed in order to render life-like visuals of the various physical scenarios, from putting greens to sand traps, that you will want to practice for. It’s also the key tool that absorbs all the data provided by the launch monitor and transforms it into a visual representation of your golf shot.
- Projector : This component is used to project the visuals from the computer onto the impact screen with the goal of creating as realistic and immersive an experience as you can ask for.
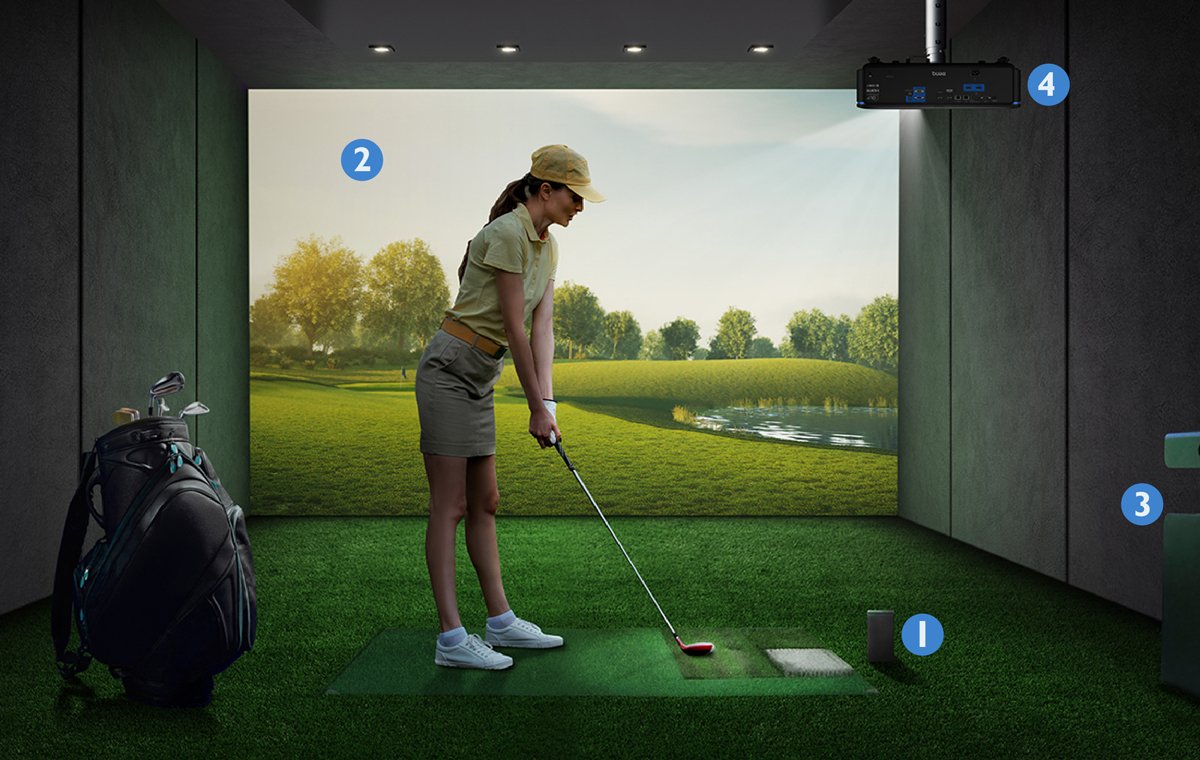
A complete golf simulator setup with the four key items
What Should I Be Aware of When Setting up the Projector?
Given the spatial limitations inherent in any indoor golf simulator, installing the projector properly is a challenge full of nuances that will help determine the success of the entire project. To ensure that your projector is at its most effective, make sure that you fulfill the following four criteria when choosing/installing a projector:
- Choose a projector with a high brightness level and long lifespan to reduce maintenance costs.
- Install the projector in a location that is far enough away from your swing radius and the flight path of the ball, so as avoid any damage.
- Install the projector within its projection range to ensure that the entire image is shown.
- Install the projector in a location that will prevent any projection-related shadows.
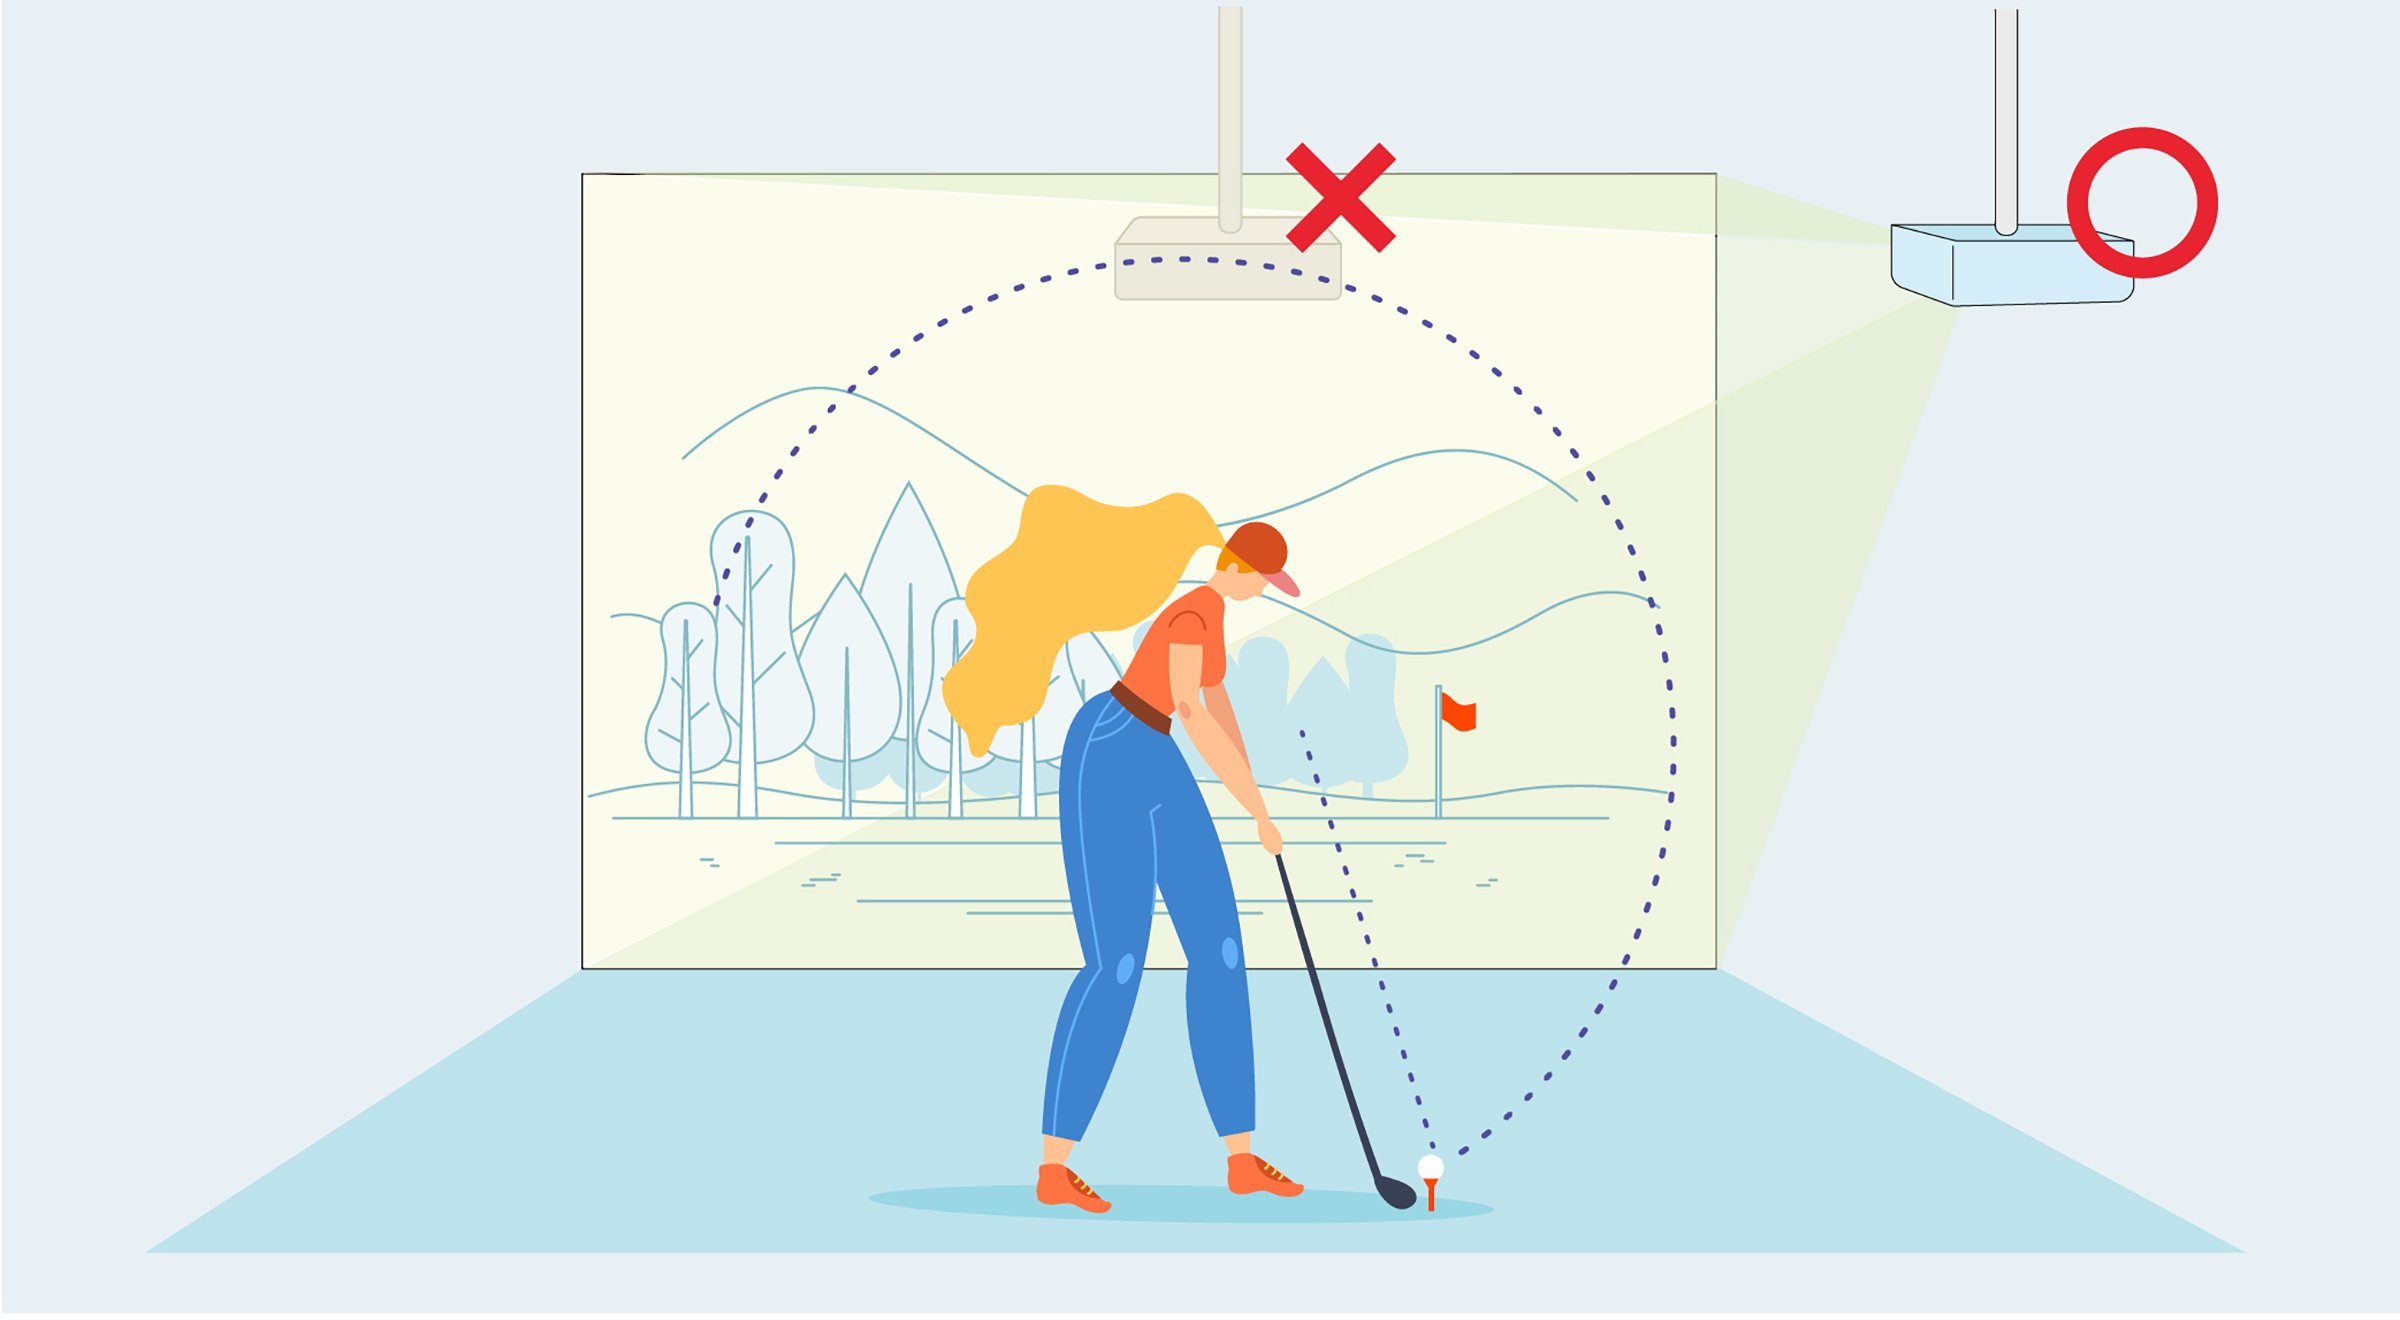
Choose a location where your projector can avoid your swing and the flight of the ball
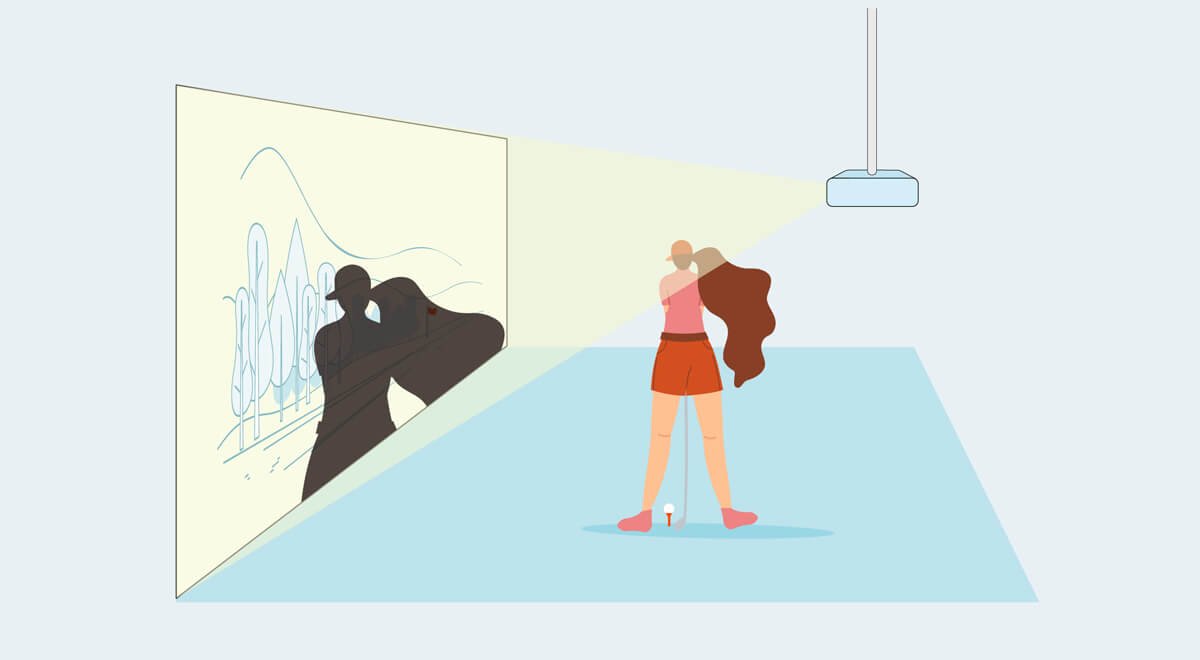
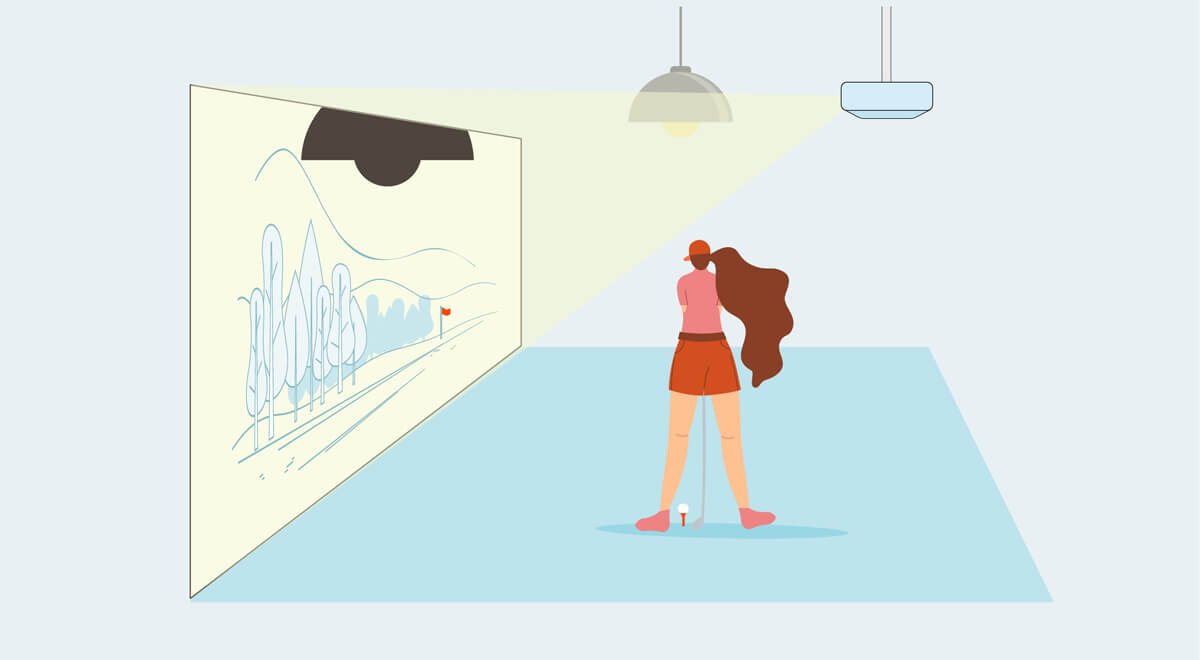
Take note to avoid shadows cast by the user or any other obstructions
Longer Life Light Sources Help Reduce Maintenance Costs
The light sources for the most commonly used projectors usually fall into three categories: traditional (either a high-pressure mercury or xenon) lamps, lasers, or LED lights. Traditional bulbs have the advantage of being a tried-and-true technology with low purchasing costs, but they come with the major disadvantage of a short-life span. Under normal conditions a traditional lamp gives you about 4,000 to 6,000 hours of light. Furthermore, in the span of those thousands of hours, the light from the lamp tends to deteriorate, becoming both darker and more yellow. This results in mounting maintenance costs.
With the costs associated with laser technology lowering in recent years, there has been a corresponding drop in the price of laser projectors. As lasers are able to produce a wider selection of wavelengths, they feature a larger color spectrum allowing them to re-create over 90% of the colors visible to the human eye for near perfect color representation. At the same time lasers feature ultra-high brightness and long lifespans of roughly 20,000 hours of use, thereby drastically reducing maintenance costs. With the benefit of such high-quality output and overall reliability, laser projectors are ideal candidates for golf simulators.
Why Throw Ratio Should Be the First Thing on Your Mind
A projector’s throw ratio refers to the ratio of the throw distance (the distance from the projector to the screen) to the width of the projected image. Knowing a projector’s throw ratio lets you calculate the desired screen size and corresponding installation distance ahead of time.
Calculating a Projector’s Installation Distance:
Screen Width (in centimeters) x Throw Ratio = Installation Distance
Online Throw Distance Calculator
Based on research, the ideal screen size for a golf simulator is roughly 17-20 feet wide by 9 meters tall. An average long-throw projector most likely won’t be able to achieve this screen size in the limited footprint most golf simulators occupy. And even if they are able to, they might produce shadows due to the distance their installation requires in order to achieve that screen size. Ultra-short throw projectors, on the other hand, though they are, by definition, equipped to produce large images in a short distance, would probably need to be installed within the flight path of the ball to produce the ideal screen size mentioned above, leading to a high risk of damage. If you want the distance between the screen and the golfer to be about 3 meters, a projector with a throw ratio of roughly 0.8 will be able to accommodate a 100-inch image at a 4-meter throw distance. These conditions give you the most ideal and effective space without producing shadows.
Look for Features that Give You Flexibility during Installation
Given that most spaces for golf simulators have height restrictions due to the ceiling, it’s best to avoid installing your projector straight in line with the center of the screen so as to keep your projector away from your swing radius. Consequently, installing the projector at an angle (i.e. projecting from the side) is your best bet. In order to do so you’ll have to have a projector with 2D keystone correction or corner fit capabilities. These features allow you to correct for distortions to the image that results from an off-center projection. In addition, BenQ offers a selection of high-end projectors with horizontal and vertical lens shift features that let you make major adjustments to the projected image without having to touch or move the projector at all. With all of this in mind, it’s easy to see how features such as these, that give you greater flexibility in terms of projector position, are must-haves to optimize your simulator.
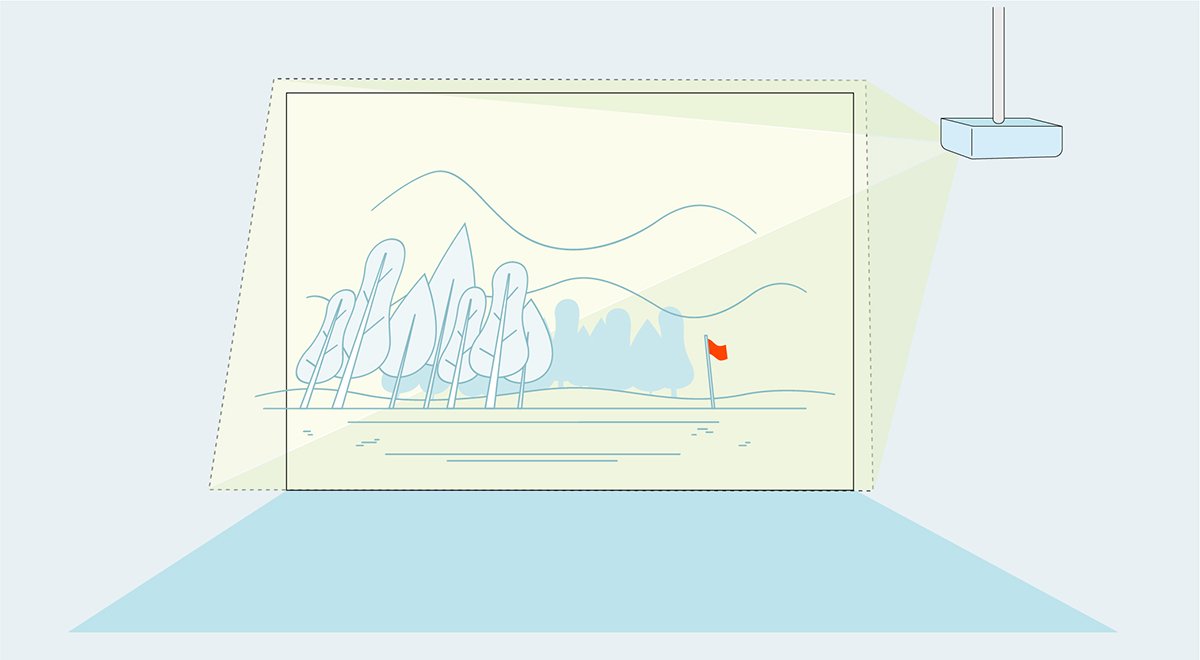
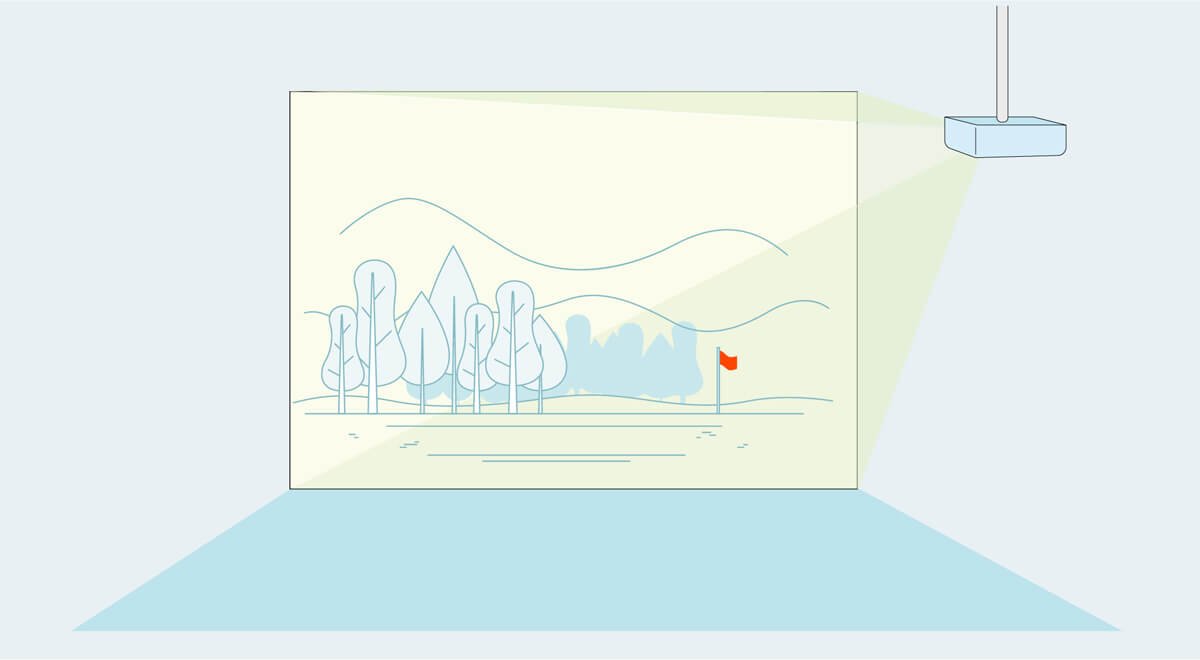
2D Keystone and Corner Fit features help correct distorted images
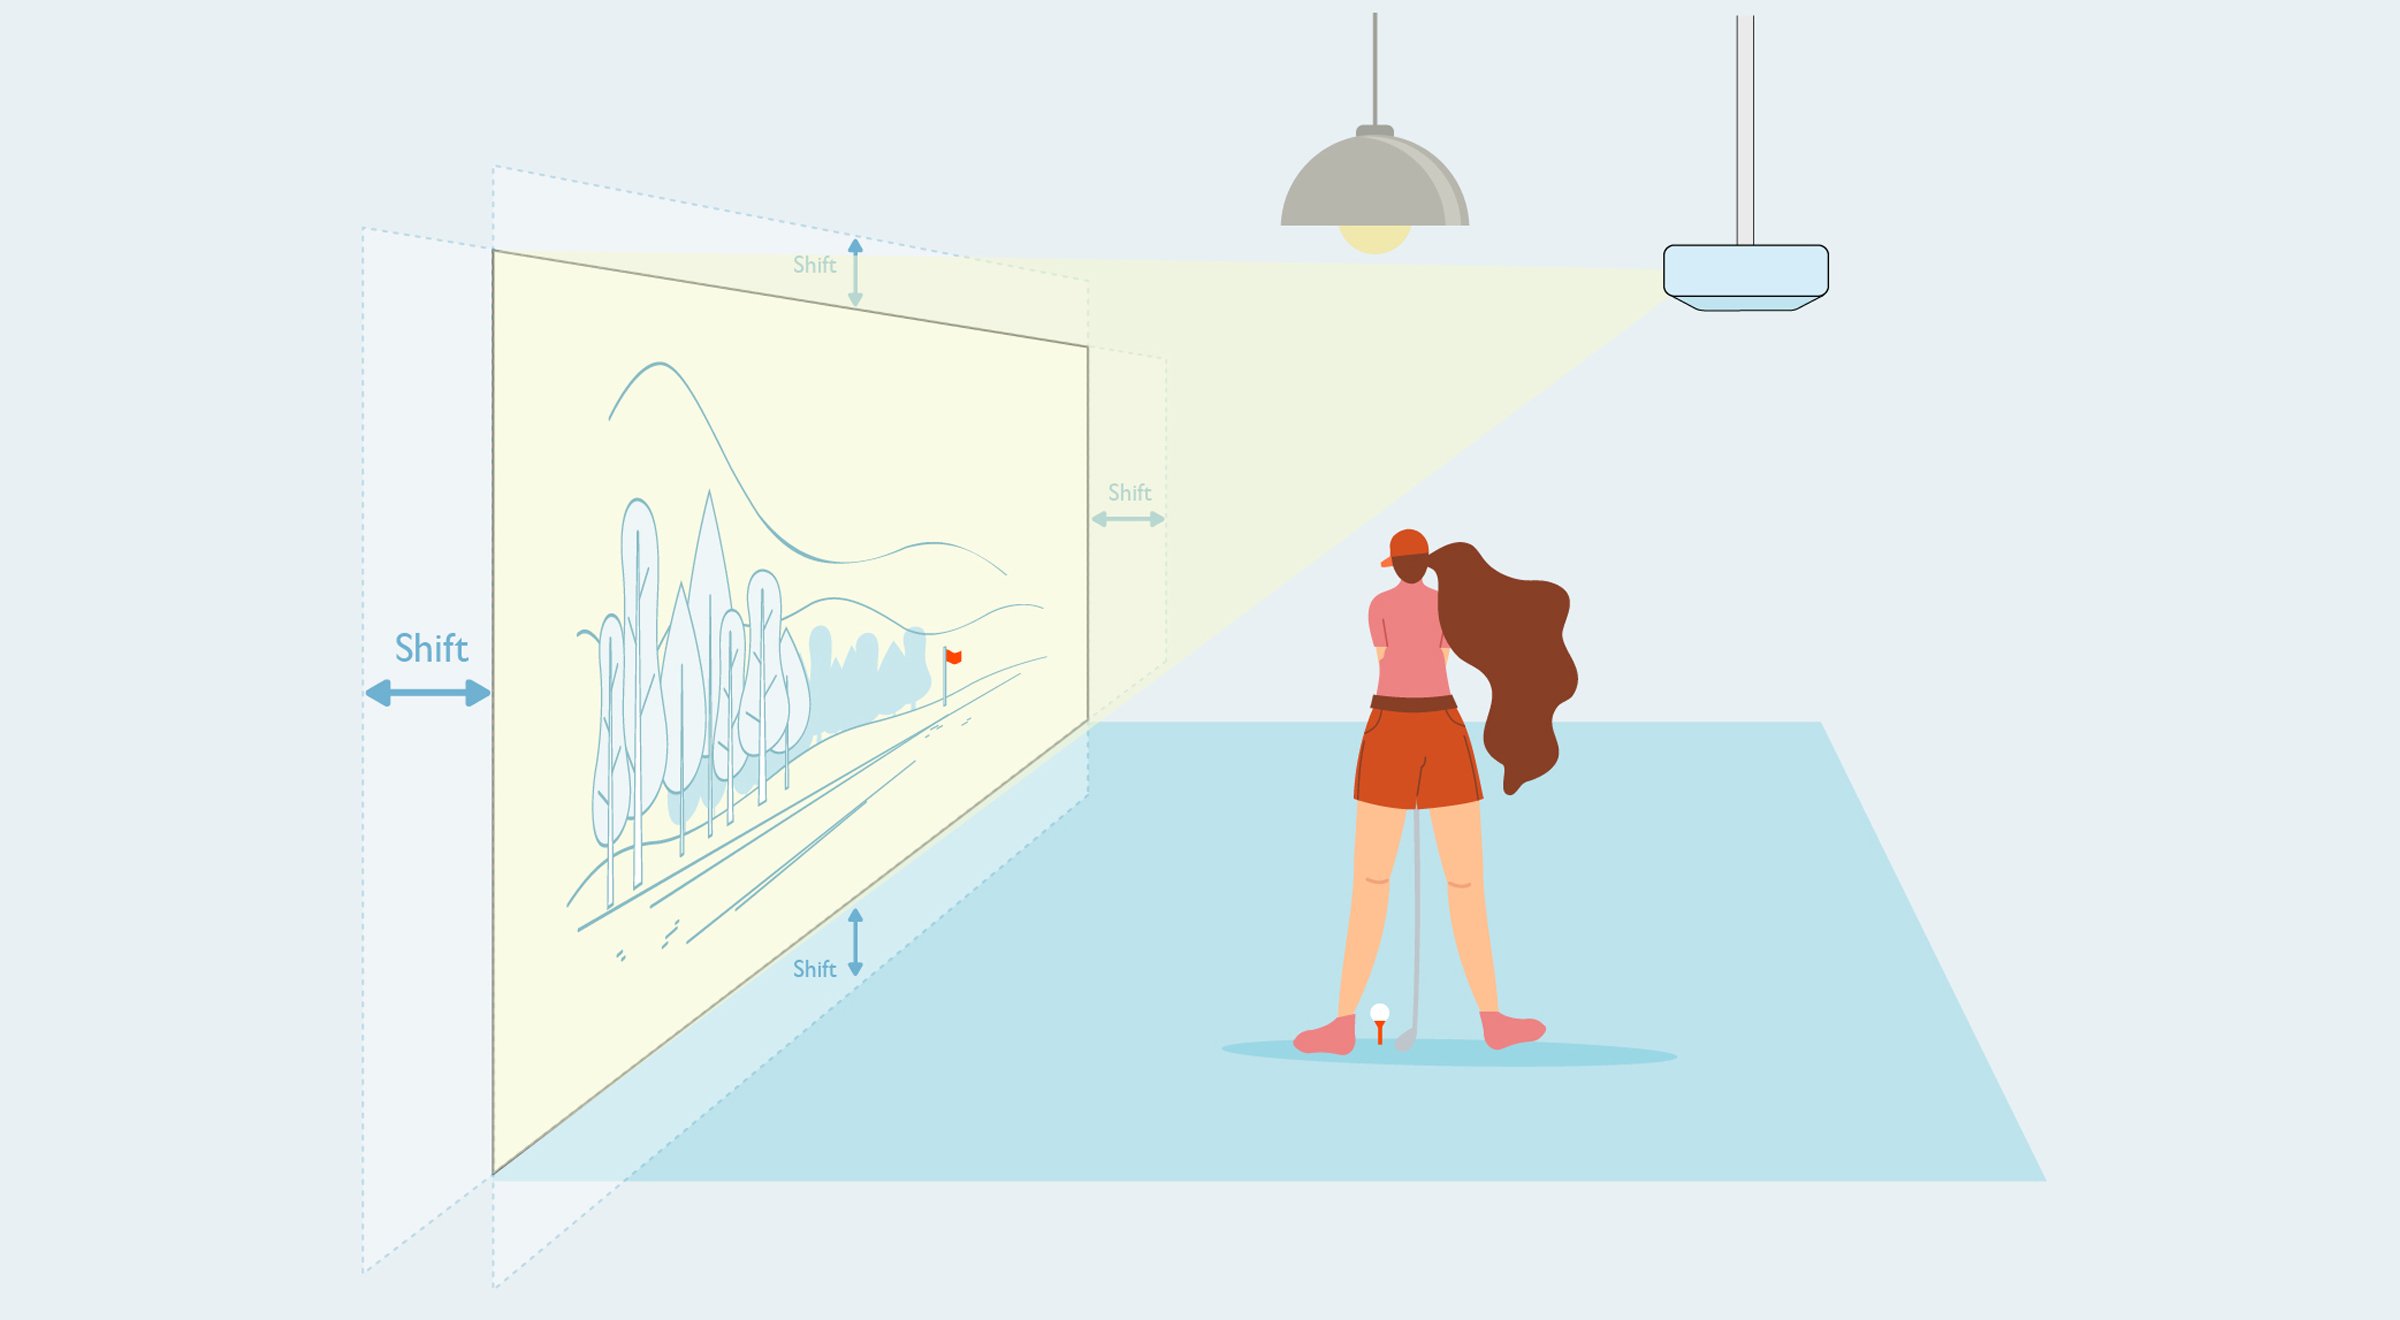
Horizontal and vertical lens shift features that let you make major adjustments without moving the projector
BenQ has trained staff to help you find the perfect golf simulator projector – within your room size and budget. To help you make the best decision, you can reach out to one of our experts to set up anything from a chat to a complete online demo, to help you find the right projector for your needs.
You may also like
-
Golf Simulator Projector Resources
What is the best place to mount a golf simulator projector?
A guide to help understand where and why projectors are placed in front or overhead in a Golf Simulator setup
-
Golf Simulator Projector Resources
What are the best projectors for the Uneekor golf simulator system?
-
Golf Simulator Projector Resources
What Is the Perfect Projector for a SkyTrak Golf Simulator?
The best projector for SkyTrak Golf Simulators for any budget
-
Golf Simulator Projector Resources
Why a 4K DLP Laser Projector Is the Only Way to (Simulate) Play against Tiger Woods?
-
Golf Simulator Projector Resources
What are the best projectors for a garage golf simulator?
Read about different options for mounting your projector for your garage golf simulator
-
Golf Simulator Projector Resources
How much does a golf simulator projector cost in 2024?
How throw ratio, resolution, brightness, and light source impact the cost of your golf simulator projector and your different options depending on your budget